3 Create a DMP project
3.1 Creating a project DMP from the PARC Project-level DMP Template
Decide first within your project who would be responsible for creating the project DMP in the DSW. Select Projects from the Dashboard (both marked as red boxes on left hand side in Figure 3.1) and select “Create” button.

Figure 3.1: Screenshot of steps to how to create project from project template. The screen shown in Figure 3.2 appears, select “from project template” tab.
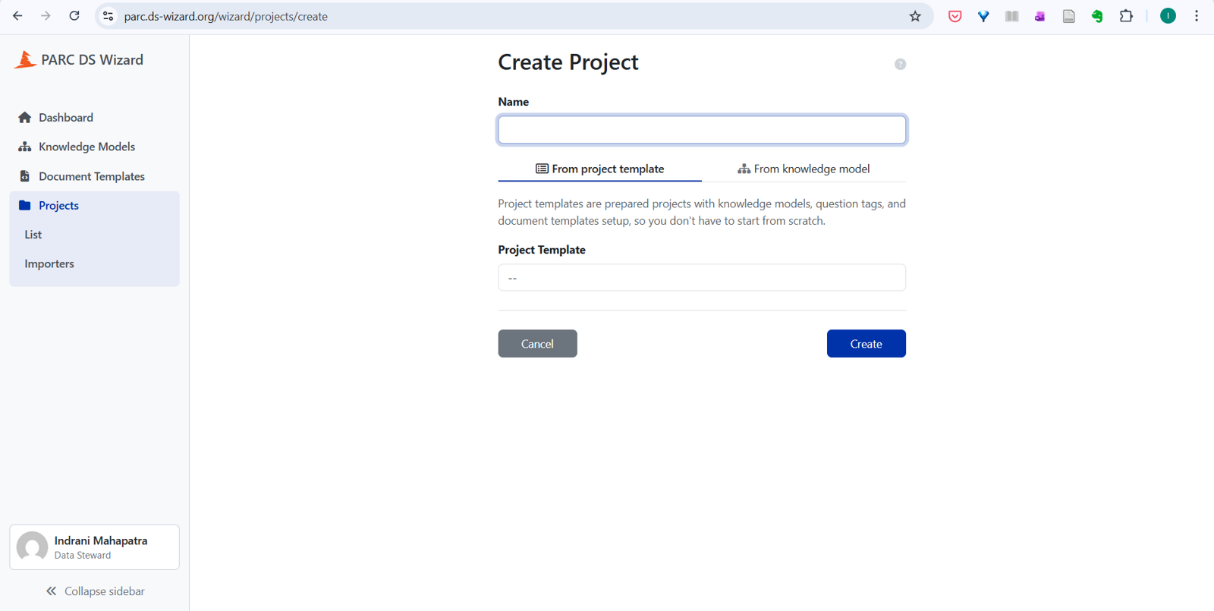
Figure 3.2: Screenshot to show “from project template” tab. From the dropdown, select “PARC project-level DMP”. This selects the default “PARC Project-level DMP template” as starting point for creating a project.
ImportantPARC_T4.1/PEH template for HBM projectsFor HBM (T4.1) projects, please select the “PARC_T4.1/PEH” template as this includes HBM-specific guidance and pre-filled questions concerning the PEH Data Platform.
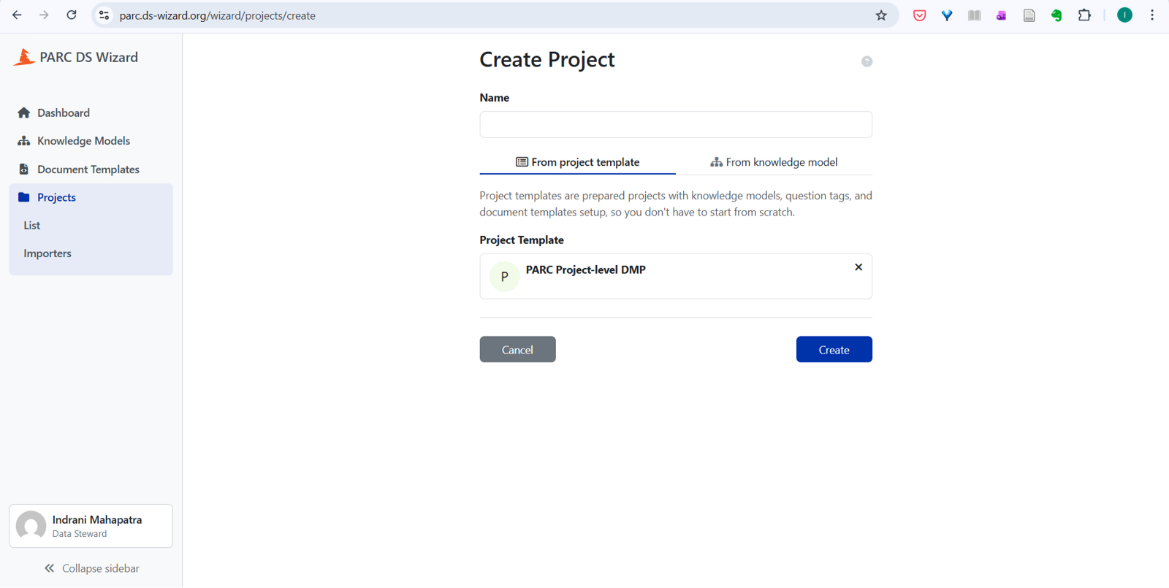
Figure 3.3: Screenshot to show the selection of PARC Project-level DMP Provide the name of the project (preferably project ID) and select the blue button “Create”.
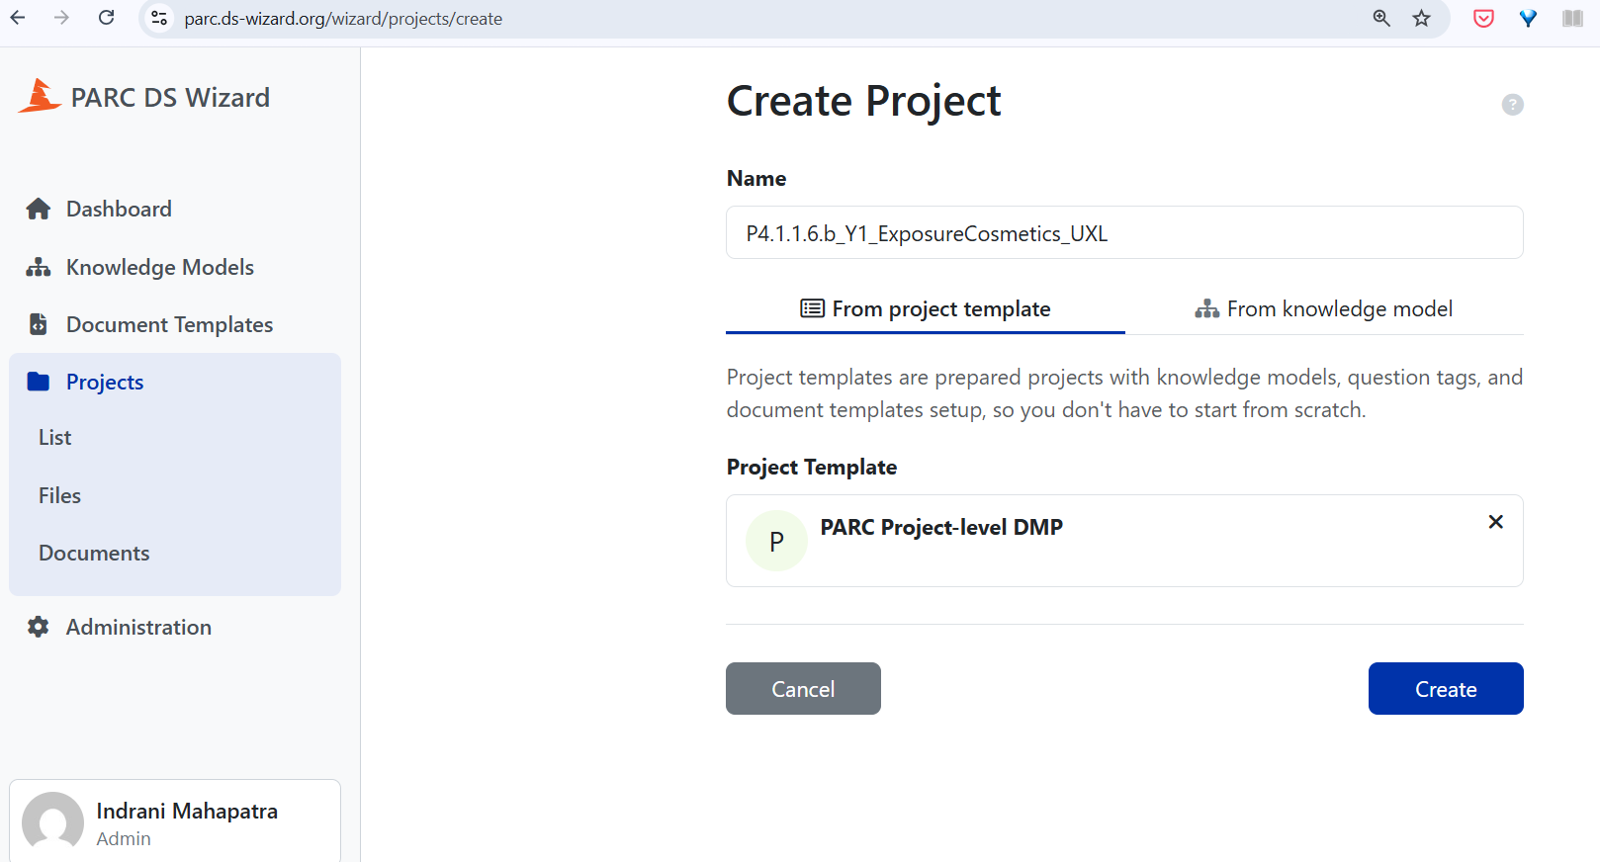
Figure 3.4: Screenshot – “Name” field where name of your project (i.e., project ID) is to be typed You will see the screen as shown in Figure 3.5
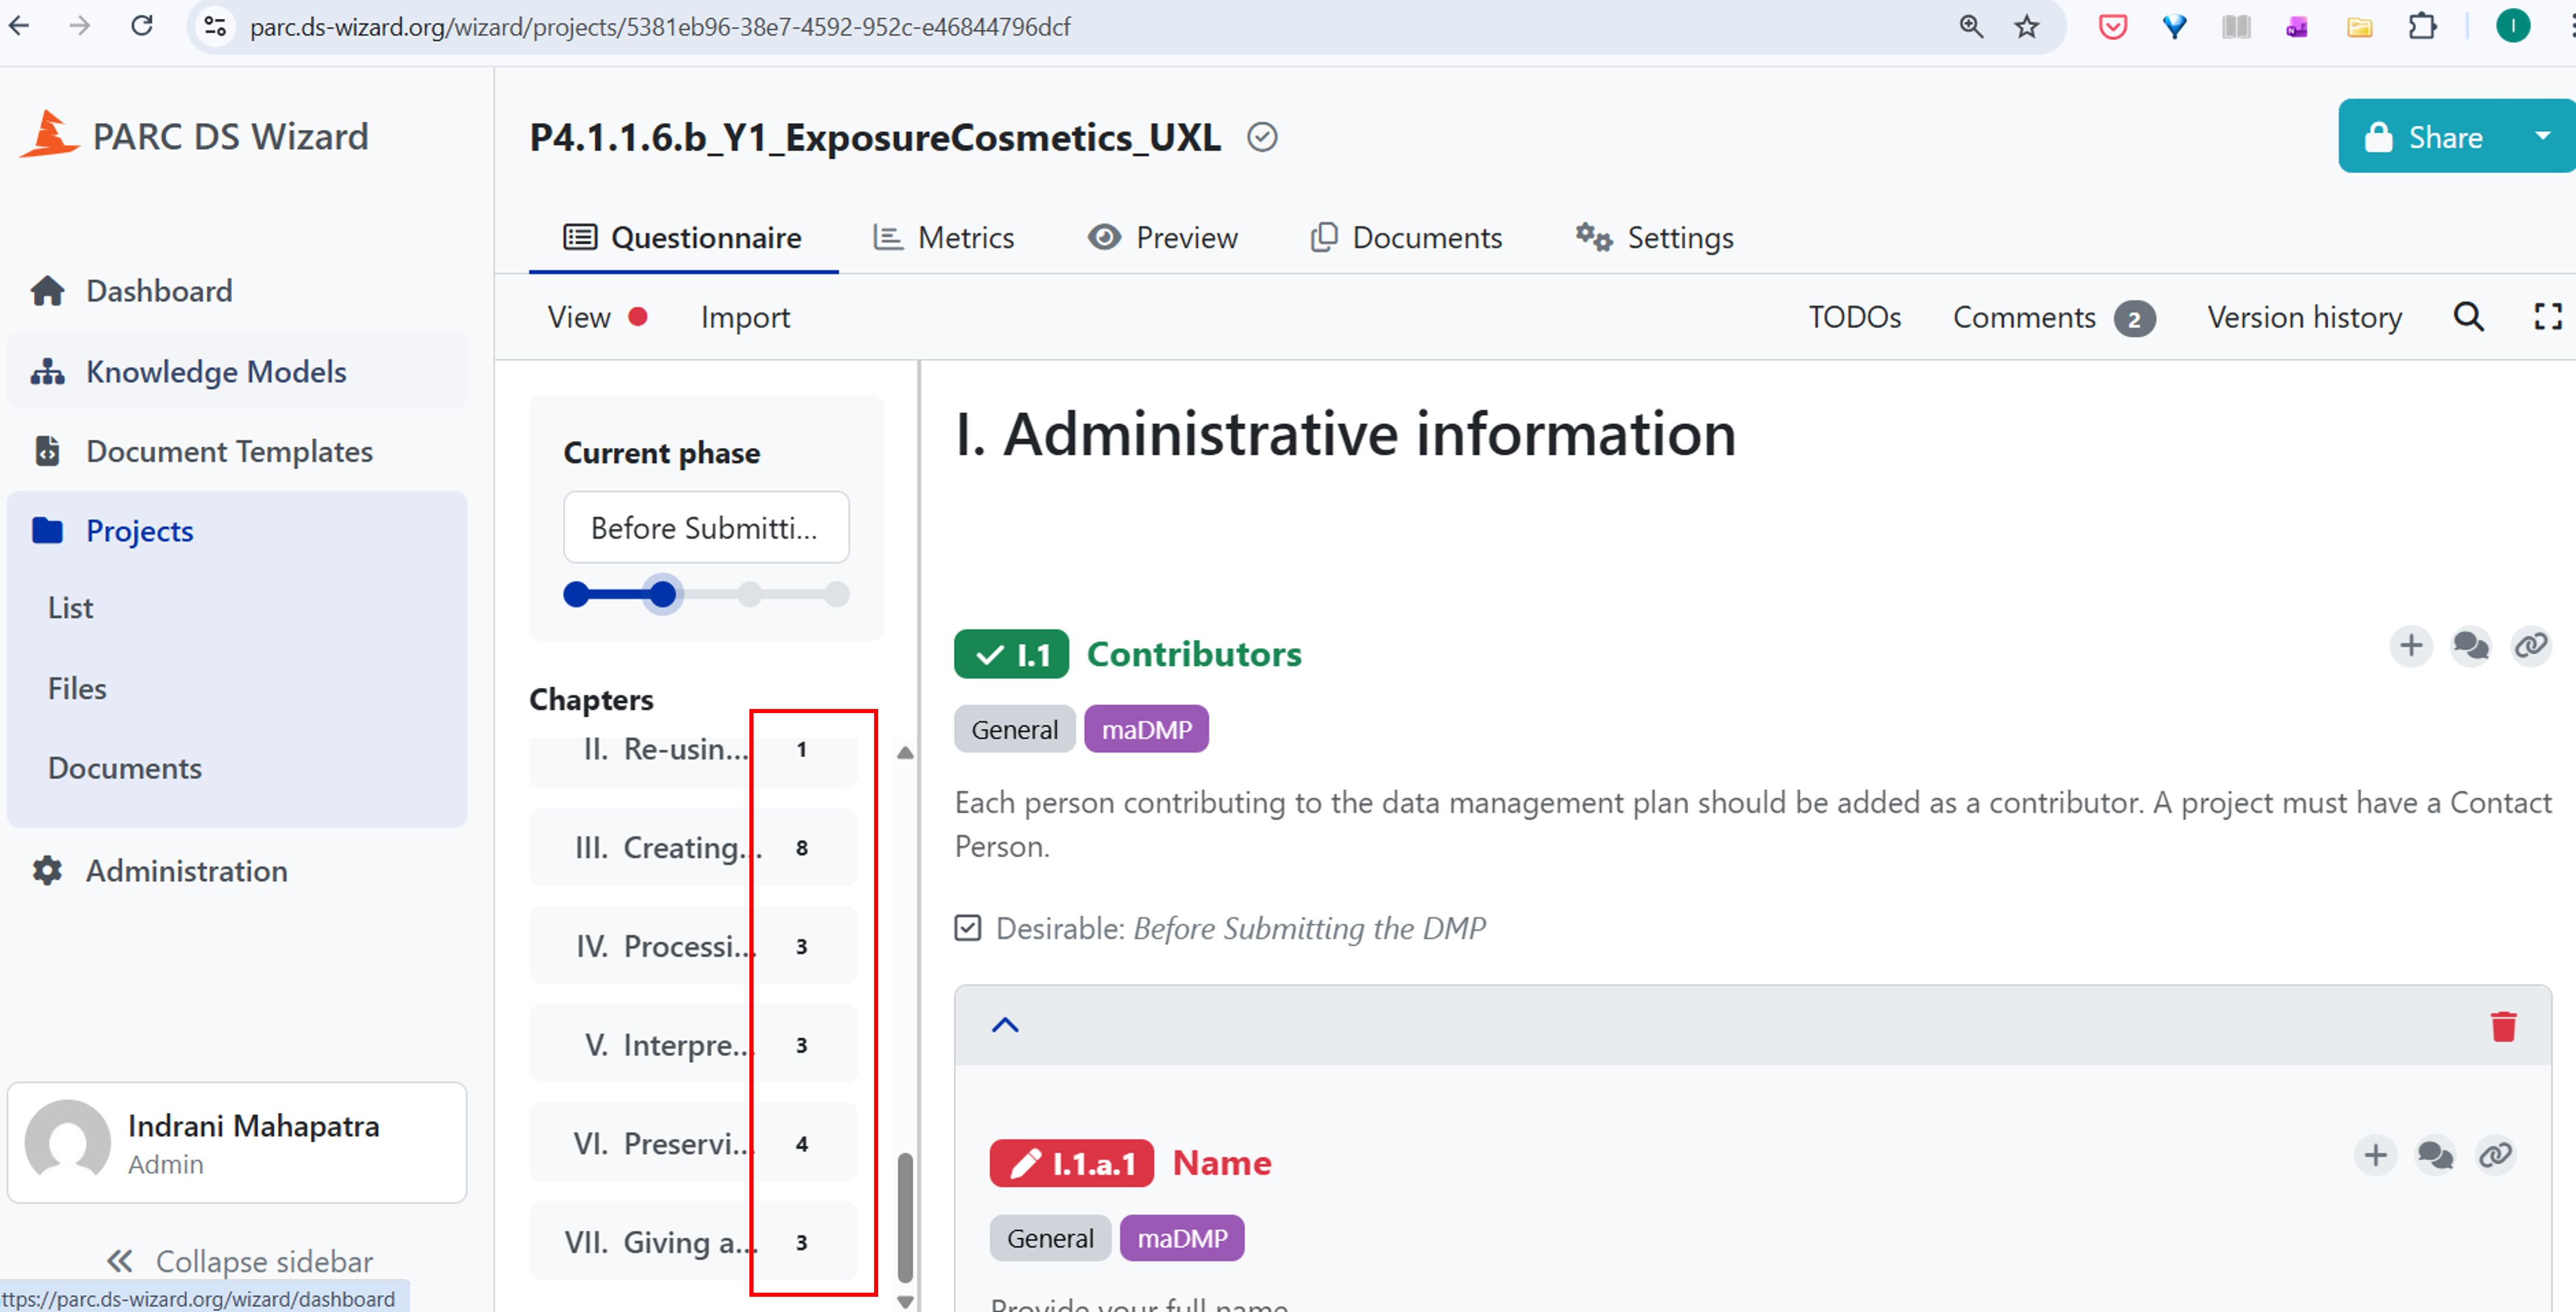
Figure 3.5: Screenshot showing the questions in the PARC Project-level DMP. On the left hand side you can see the snapshot of phase of the DMP (i.e., Before Submitting the DMP) and sections showing the main stages in the research data lifecycle: re-using (existing) data, creating and collecting data, processing data, interpreting data, preserving data, access to data. The number next to the sections/chapters indicates the number of mandatory questions that remain to be answered.
3.2 Sharing your project DMP with collaborators/WP7
Use the Share button to share the DMP draft with project members from your project, Data Champions/ Data Liaisons, who have registered to the DSW Wizard and who can help you fill in the details. Please ensure that you have all relevant members (only select a small group of owners) of your project to sign up and agree upon one common DSW/DMP instance for your Project.
Also, share with WP7, findable with the username “WP7 DMP Troubleshooters” to have your comments visible to WP7 members.
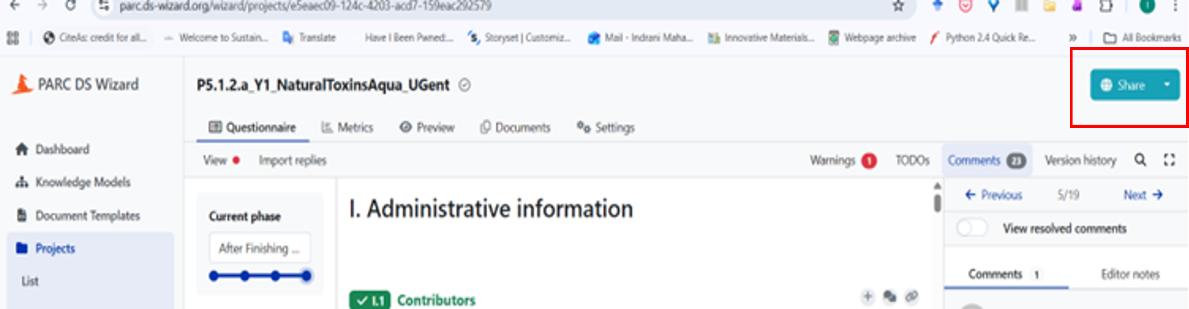
Figure 3.6: Screenshot to show where to click to share the DMP with other members of the DMP-team for the project. After clicking the “Share” button, start adding users based on the Roles defined in Appendix. In Figure 3.7, when the first few letters of a person’s name are put in the “Users” field, we get a drop down and you can select that person to add as a user. Please make sure that the person you want to add as a user has signed up to the DSW, otherwise, their name won’t appear. Within one PARC project, different datasets may be created by different PARC partners simultaneously and the person who is taking up the role of DMP’s contact person would have the responsibility to collect the details of these datasets to be included in the DMP.
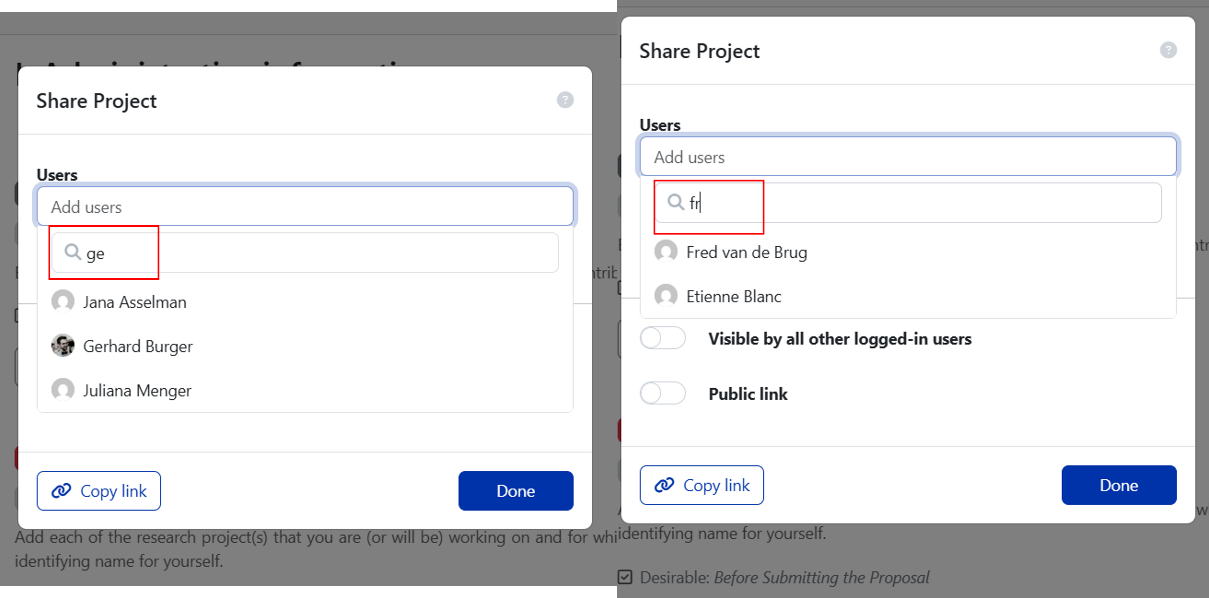
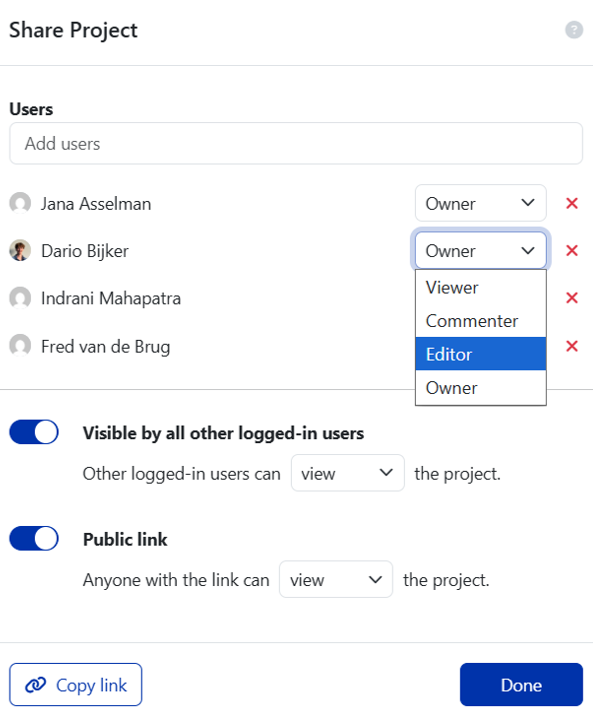
Figure 3.7: If you want to make the Project‑DMP visible to others who are logged‑in the DSW, toggle (slide) the button (where it mentions “visible by all other logged‑in users”) to the right. You can choose to make the DMP available as a public link (use the toggle to make the decision). Choose the option “view” (neither comment nor edit) for both logged in users and public link as you would not like anyone with the link to edit or comment. Please note that at the project completion, all DMP links will be public. After adding users for sharing purposes, give them user rights – owner, viewer, editor, commenter . You may give project team members the right to comment or edit. If your project has a deputy project manager, make them also an owner. You can add the WP7 Data Liaison as an Editor. However, if you want to be able to directly tag WP7 members to comments/aspects (Figure 3.7) with which you might need help, make “WP7 DMP Troubleshooters” as “owners”.
 .
.The access conditions related to different user-right categories (from DSW instructions on Sharing) are provided below.
Role permissions Viewer Commenter Editor Owner View project ✔ ✔ ✔ ✔ Metrics ✔ ✔ ✔ ✔ Preview ✔ ✔ ✔ ✔ View documents ✔ ✔ ✔ ✔ Comment on project ✔ ✔ ✔ Change answers ✔ ✔ TODOs ✔ ✔ Version history ✔ ✔ Create documents ✔ ✔ Editor notes ✔ ✔ Sharing settings ✔ Project settings ✔
3.3 Selecting the right project phase
Please select the DMP development phase from the drop-down menu.
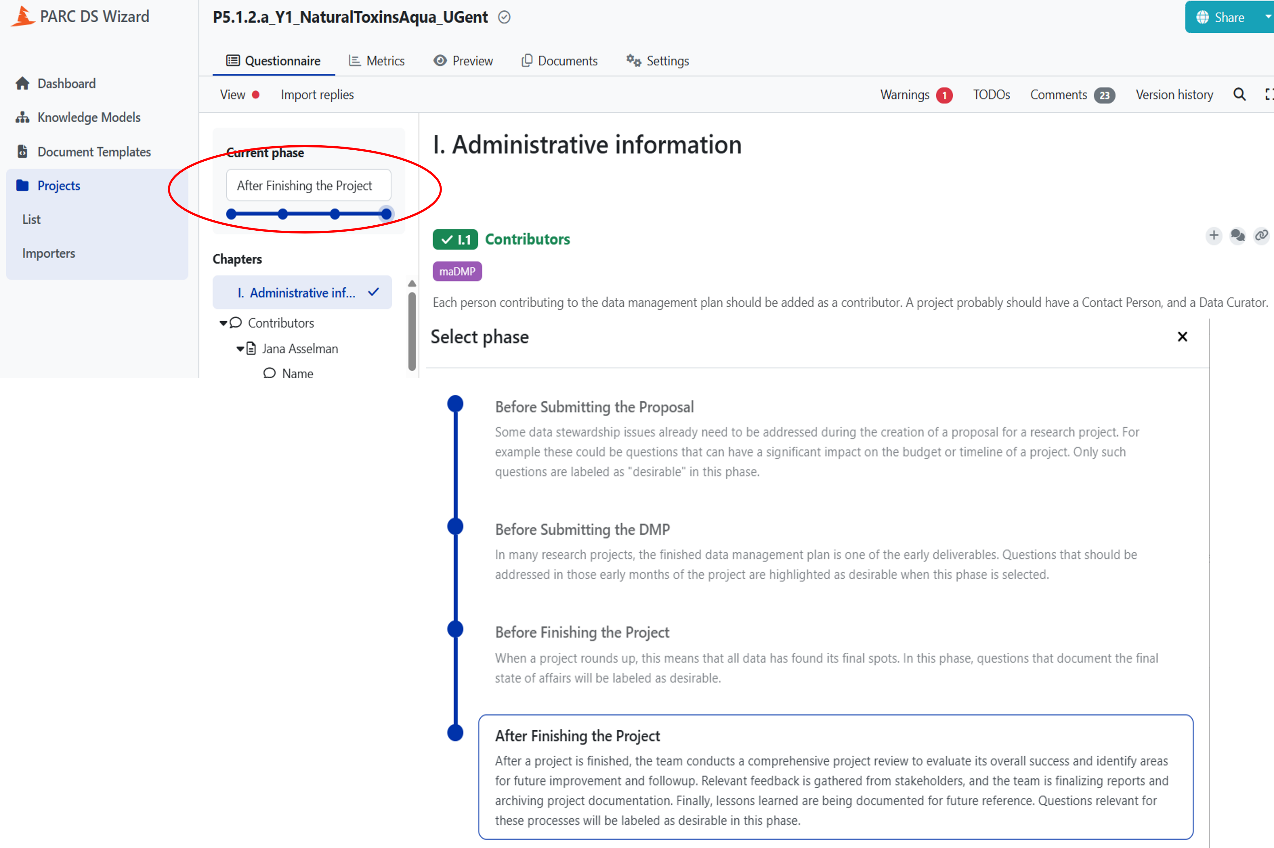
Figure 3.8: Screenshot which shows there are four phases provided in the Wizard (see “select phase” for explanations.)
3.4 Filling in the DMP
You can add comments (see red bordered circle at the top right in Figure 3.9) for project members and then assign them (see the person emoticon within the second red bordered circle at the right in Figure 3.9) to check/review the answers.
WarningOnly Owners or Editors can be tagged in this way, so make sure people you want to tag are added first.
NoteTagging the WP7 DMP TeamTo tag the WP7 DMP Team search for “WP7 DMP Troubleshooters”. They can also be reached by email (WP7 DMP Troubleshooters) if you need additional help/ any question isn’t clear to you.
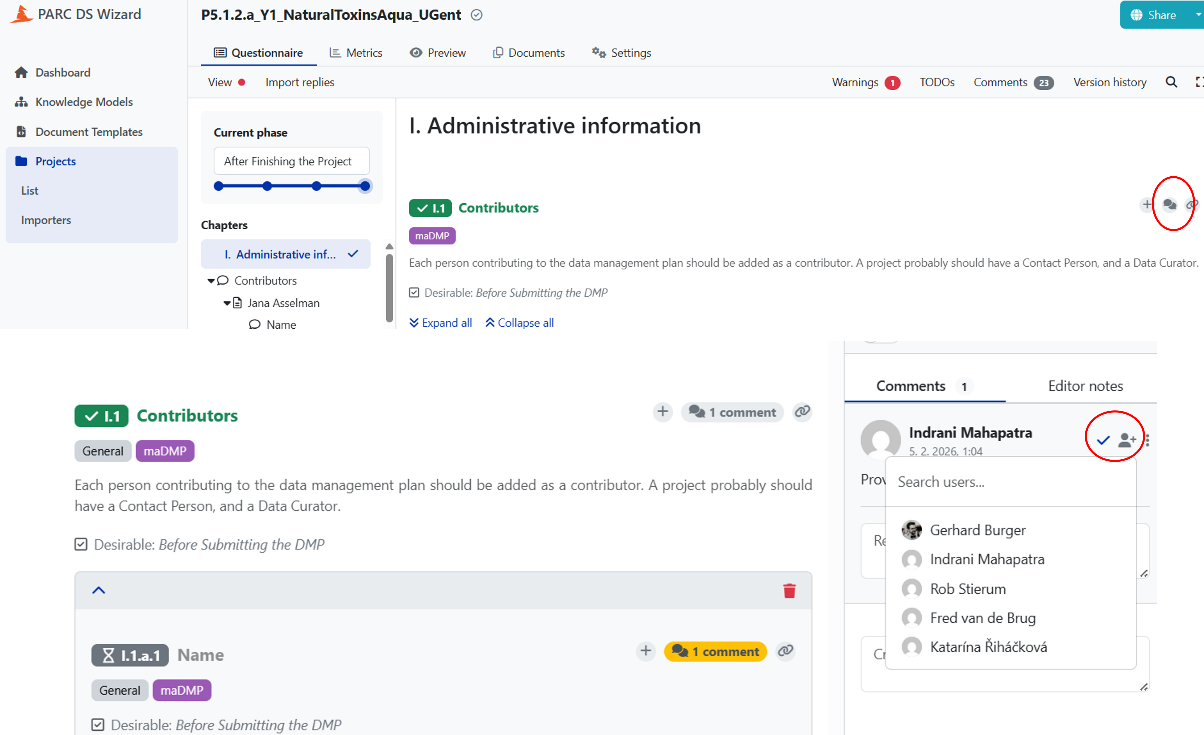
Figure 3.9: Screenshot to show where to add comments and how to assign them to project members and/or WP7 DMP team members. Here, you can assign to WP7 DMP Troubleshooters if you have added them as users and given them owner/editor rights. Clicking on the plus sign, to the left of the comment sign, will give you a TODO which helps you to keep a note of things you need to attend to/come back to.
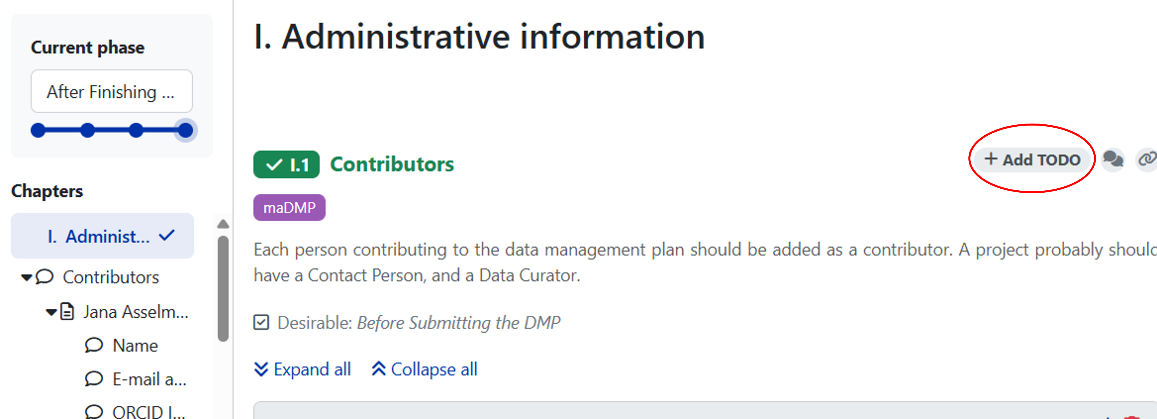
Figure 3.10: Screenshot to show the “Add TODO” button
3.5 Exporting your DMP as Document
In order to keep track of your DMP at different stages of completion , you can export your DMP in various formats (PDF, MS word, HTML) to your own environment. Suppose projects update the DMP every six months (we are suggesting this as a good practice), a static snapshot of the updated work is saved as a new document (document tab, create new document, see Figure 3.11 and Figure 3.12) and download/export the filled questionnaire in PDF/Word. These saved documents will show the progress over time and help in PARC KPIs.
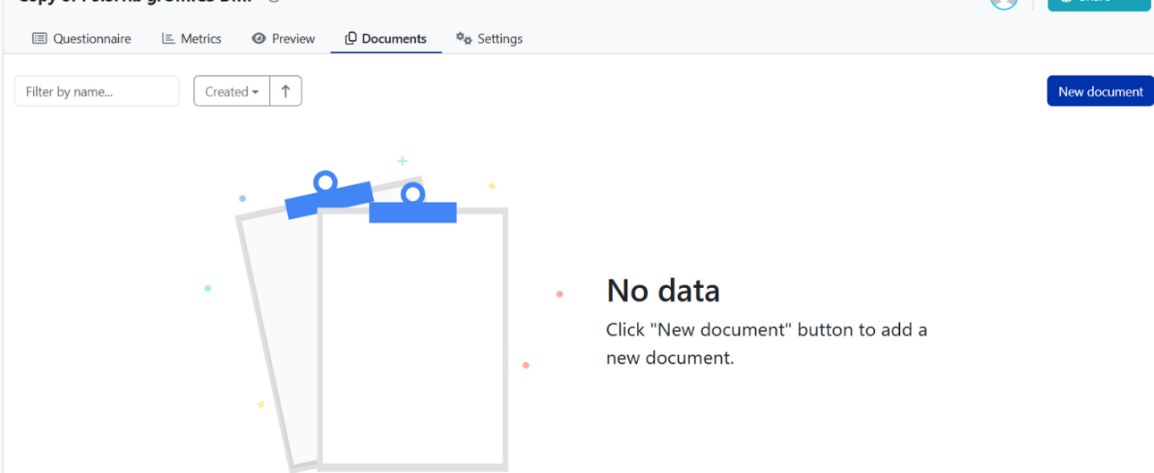
Figure 3.11: Snapshot of the screen under the document tab, when a new document is to be created. 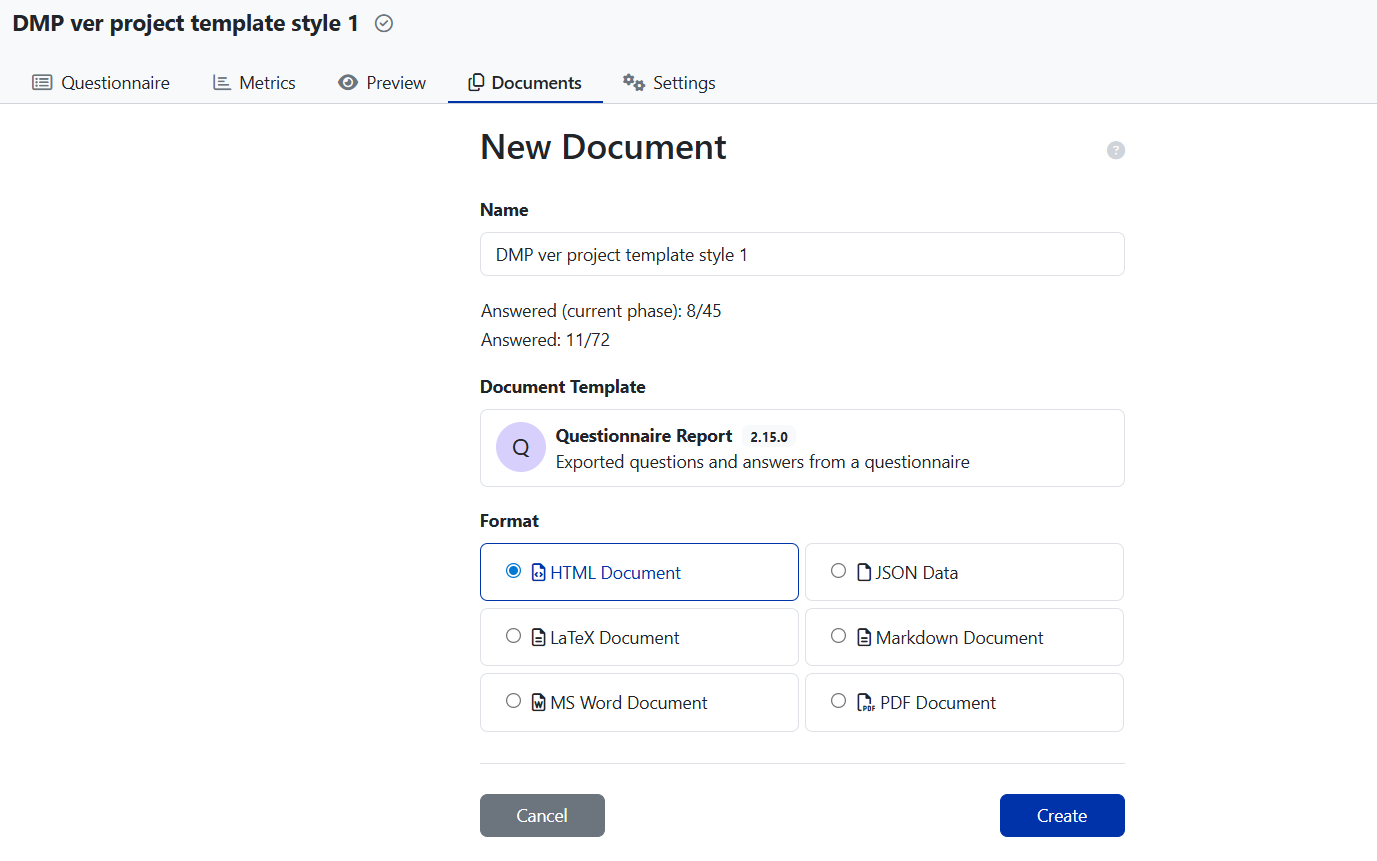
Figure 3.12: Screenshot showing fields related to document name, document template and document format. Click on HTML Document Version (default version). Select “Create.” When you select the Document Template, you can see the DMP questionnaire version to be used for exporting the questions. Select the latest questionnaire version (in Figure 3.12, it is 2.17.0)
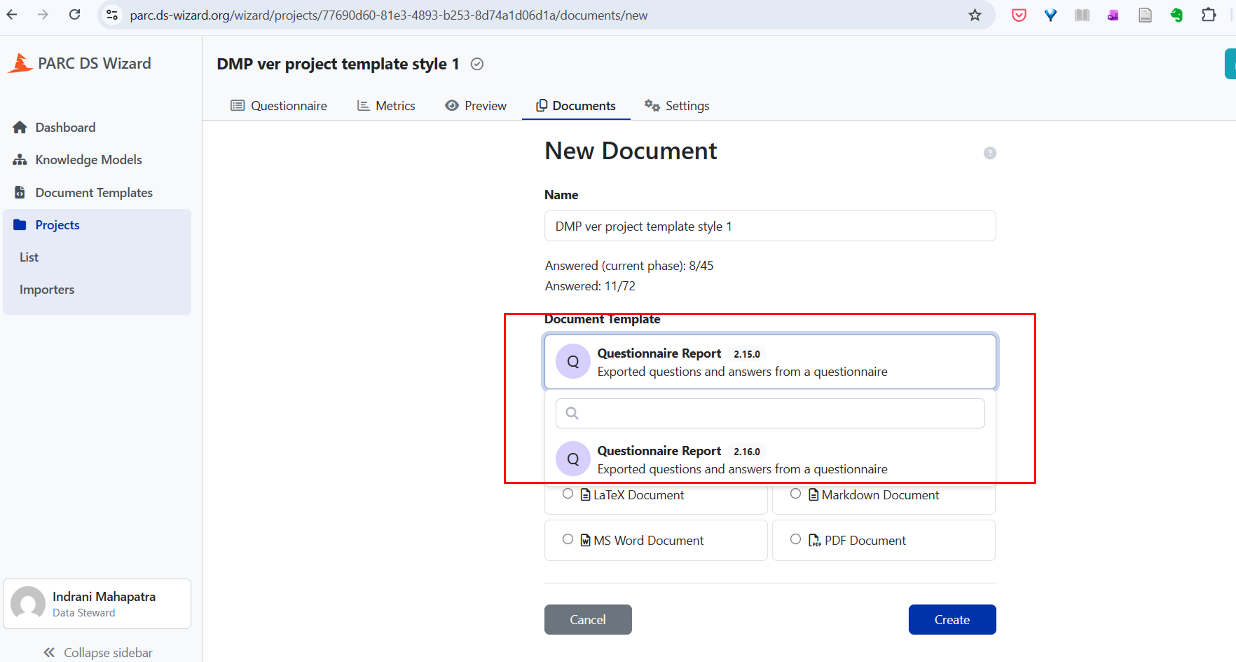
Figure 3.13: Screenshot to show how to export the filled questionnaire for PARC KPI purposes. After selecting the right questionnaire version, selecting the Document Format (see Figure 3.12, where Format is a section), and giving the document an appropriate name, hit “create” you will get the screen as shown in Figure 3.14.
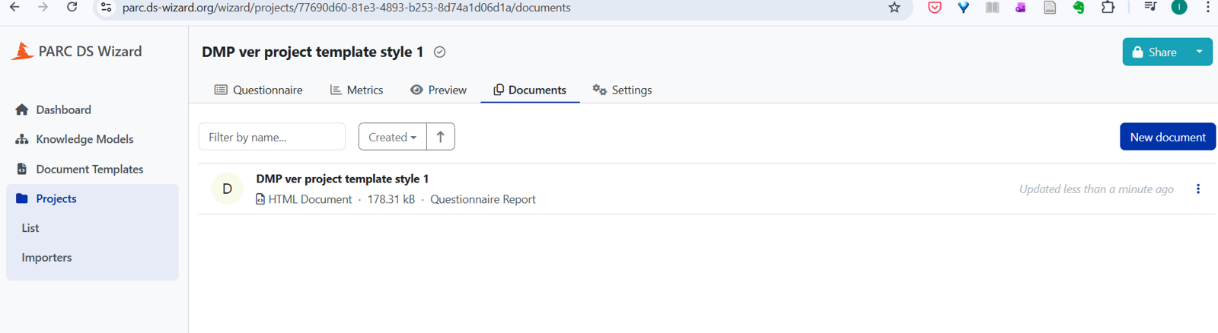
Figure 3.14: Screenshot which shows document created which saves the version of the completed file.